Install an SSL certificate
At issuance time, you will receive an email containing your SSL certificate and the intermediate certificate
Find detailed procedures for installing your SSL certificate below.
 SSL certificates on Server IIS 5 or 6
This document describes how to install an SSL certificate on a server: MS IIS5 and MS IIS6.
Step-by-step description
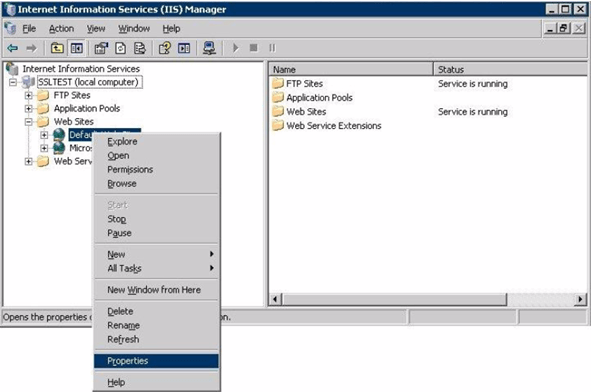
Start your IIS Manager to install the received SSL certificate. Double click on Web Sites. Right click on the appropriate website that is the same site where the associated CSR is generated. Select Properties from the menu.
1. Properties
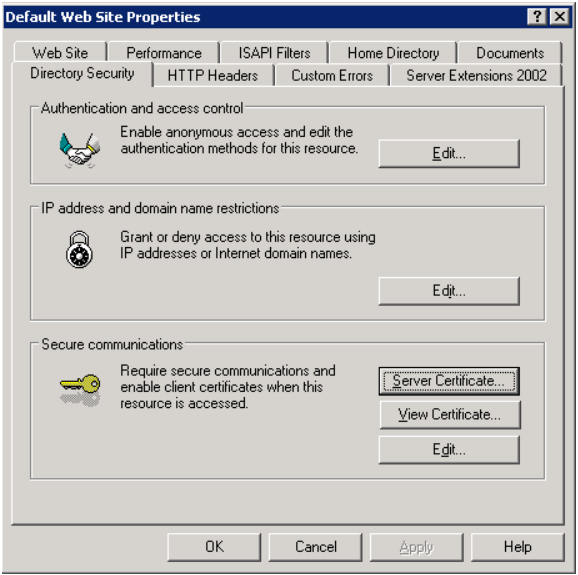
In the Properties window, select the tab Directory Security. Select Server Certificate which is located in Secure communications section.
2. Installation of your SSL certificate
You will be guided through several windows to install the received SSL certificate.
3. Pending Certificate Request
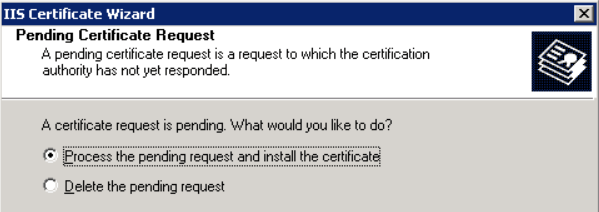
In the first window, you must select Process the pending request and install the certificate. Click Next to continue.
4. Delayed or Immediate Request
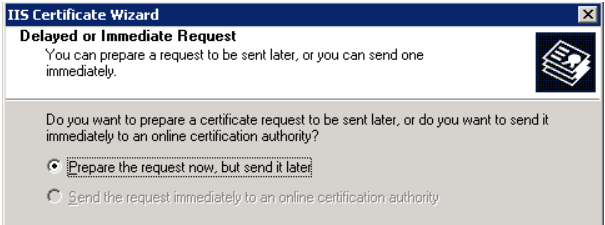
During the next step, you can choose if you want the certificate request sent immediately or later to a CA. Click Next to continue or Back to change previous selections.
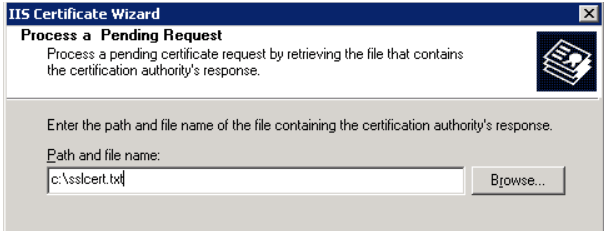
5. Process a Pending Request
In the next window, enter the location and filename of the SSL certificate you received from Payment-id. Prior to this, you have to save the certificate as a text file on the server. After that, provide the name and location of the text file or select Browse to locate the file. Then click Next to install the certificate.
 SSL certificates on Server IIS 7
This document describes how to install an SSL certificate on a MS IIS7 server type.
1. Step-by-step description
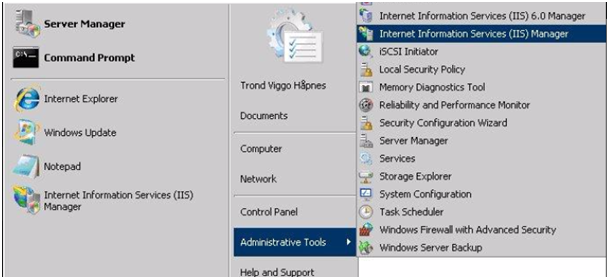
Start your IIS Manager to install the SSL certificate on the same server where the CSR was generated. Then select Administrative Tools. Next, select Internet Information Services (ISS).
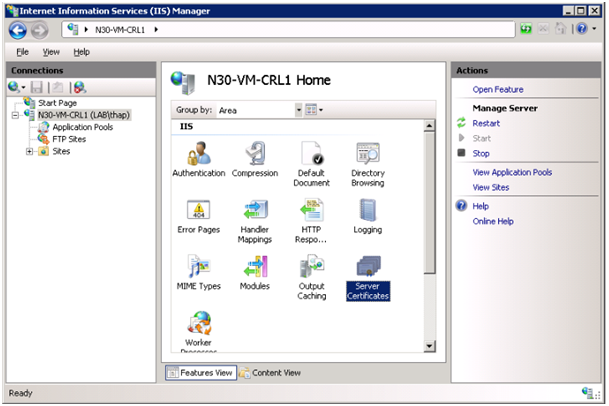
2. Select server name
Select the appropriate server name. Then double click the icon Server Certificates.
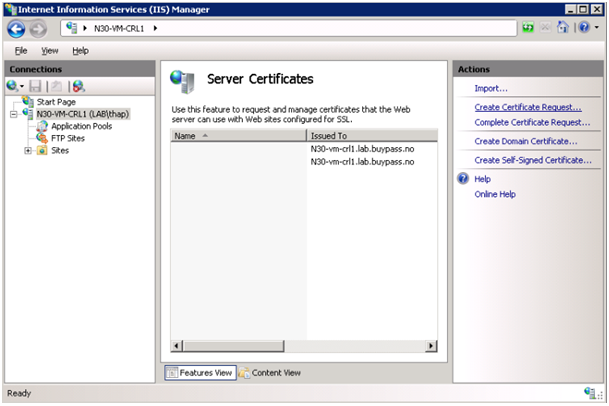
3. Server Certificates
You select the server name in the left column, and then double click Server Certificates. When the window below appears, select Complete Certificate Request, which is located on the right side of the window (Actions).
4. Installation of an SSL certificate
You have to save the SSL certificate that you received by email as a text file:
- Open received emails containing the SSL certificate.
- Copy the certificate into a text file (.txt / Notepad).
- Save the document.
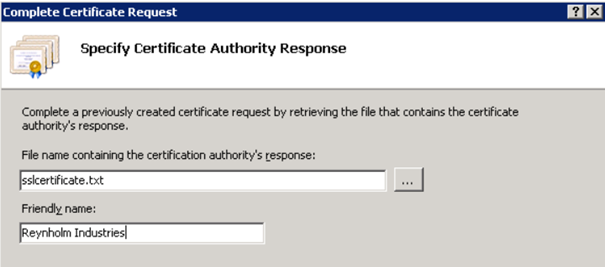
5. Specify the Certificate Authority’s Response
You have to specify the name and location of the text file. You can browse by using the ... button. Additionally, you can give the certificate a Friendly Name.
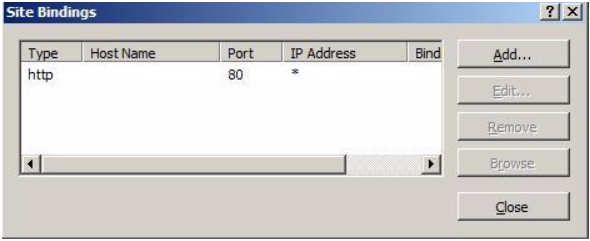
6. Site Bindings
The certificate has now been installed on the server. In order to use the certificate on a web site, you must associate the certificate with the web site.
Start IIS Manager, right click and select Bindings on the website where you want to use the SSL certificate. Click Add in the screenshot below.
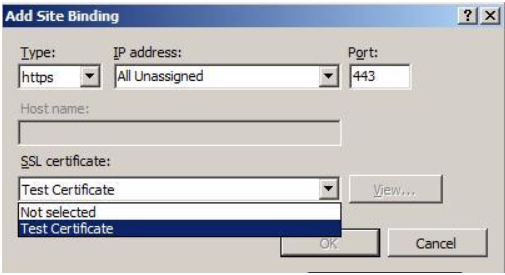
Select the type of connection and the SSL certificate you want to use. Select https as a connection type and port 443. Then select the SSL certificate. Select OK to save.
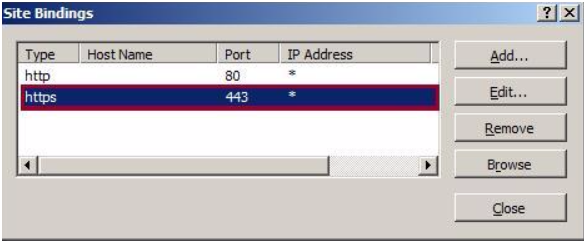
If you see the Site bindings, the website is now linked to the SSL certificate and you may close the window.
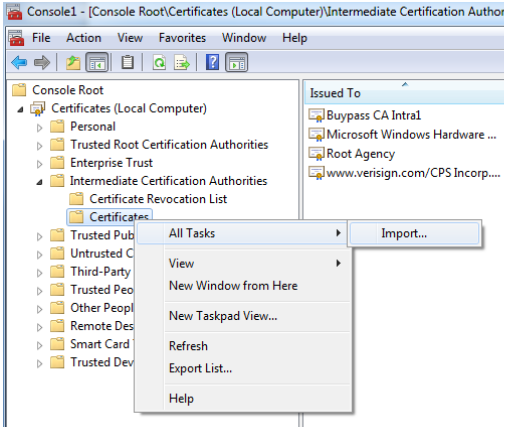
Additionally, you should install the issuing intermediate certificate, which can be done as follows:
- Save the received intermediate certificate in a file.
- Start MMC (Start, Run, mmc).
- Add Certificate Manager Snap In (Computer account).
- Right click on ‘Certificates’ under ‘Intermediate Certification Authorities’. Choose Import and select the certificate you saved.
 Linux and Open SSL
Installation of an SSL certificate on an Apache / Linux Server Step-by-step description
How to create a folder structure for your certificates
The principle is that you generate a private and public key for your desired domain.
In this example, you have generated a CSR for the domain mydomain.com. Once you have received the certificate on your email, you must save the contents in two separate files. One for theSSL- certificate, and another one CA (intermediate).
For example mydomain.com.crt and intermediate.crt
It is highly recommended that the folders which contain the private key must be available only for root. To do this, use the following command:
# chmod -R 0600 /etc/apache2/ssl
Only root may now access the private key. And last, you must enable the private and public key by configuring preferences in the correct virtual Host.
SSLCertificateFile /etc/apache2/ssl/mydomain.com/my.com.crt
SSLCertificateKeyFile /etc/apache2/ssl/server.key
SSLCertificateChainFile /etc/apache2/ssl/intermediate.crt
For more information on the configuration, please use the link below:
http://httpd.apache.org/docs/2.0/ssl/


